


The DDU10 display is an affordable addition to your simulator. It includes:
- 5" VoCore display.
- 18 RGB leds. Each led's function and color is individually configurable.
- One USB connection for data and power. No external power supply is required.
- The four buttons on the back of the display can be used to manually adjust the brightness of the display or of the led. A connector is available for external buttons. With SimHub, these buttons can use used for other functions allowed in the application.
- The USB cable is included.
- The DDU10 display is compatible with our SimDash, SimHub (see instructions) and Z1 Dashboard (support coming soon)
If not already installed, the drivers for the VoCore display can be downloaded here.
Configuring the display with SimDash
Configuration screen
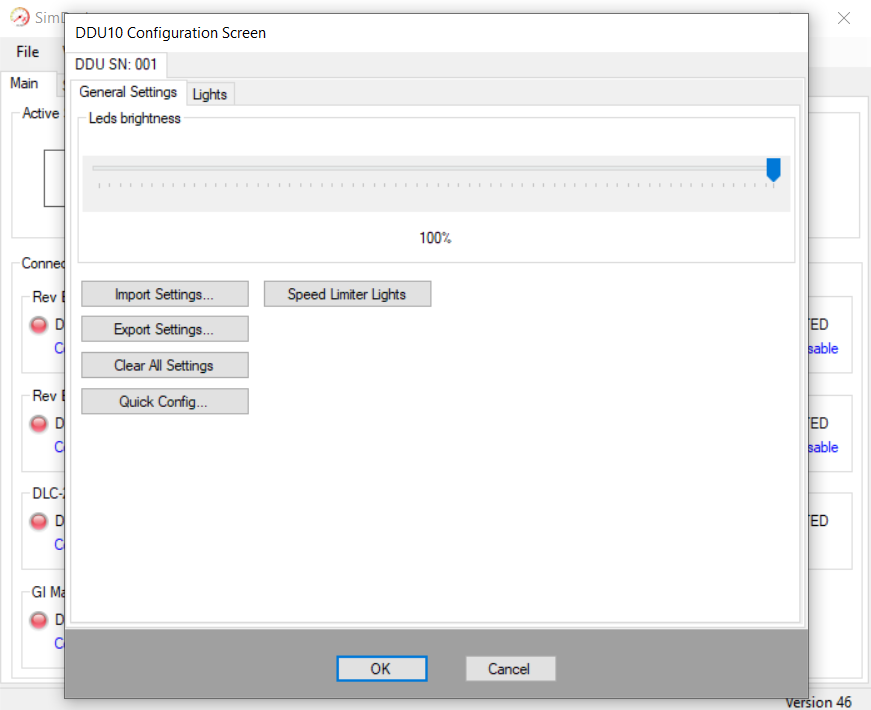
The DDU10 configuration screens are shown in the picture above. From these screens it is possible to:
- Adjust the brightness of the displays, moving the slider left or right. The LEDs' brightness can also be adjusted pressing two of the buttons on the back of the display.
- Delete all the settings and start with a fresh, empty configuration.
- Quickly configure all the leds at once, instead of one at the time.
- Import an existing configuration or export the current one: you can have different configuration files to use with different cars or different simulators.
- Press Speed Limiter Lights to define the leds pattern that will be displayed when the speed limiter is active, in the pit line.
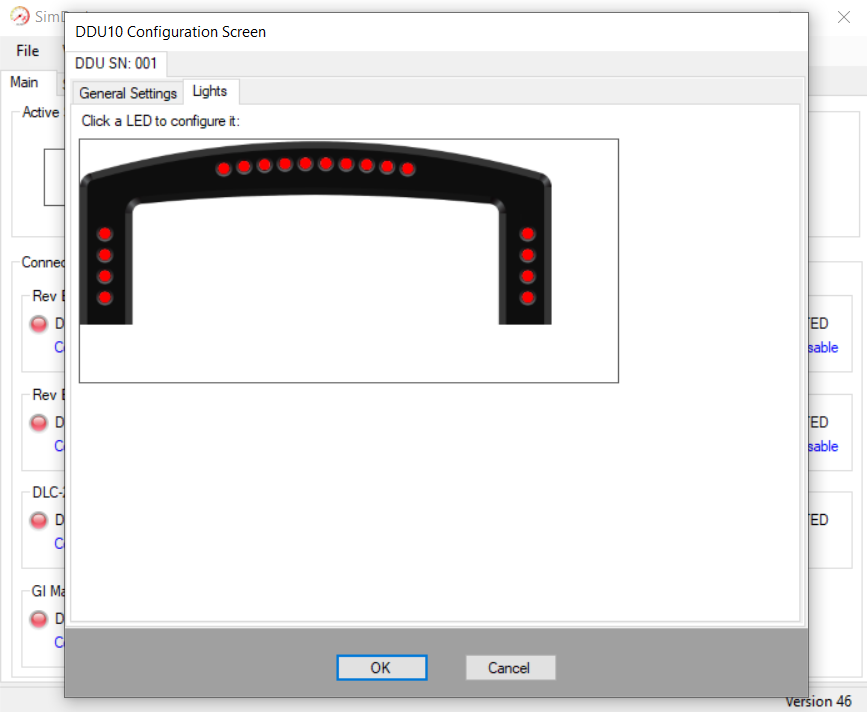
Configuring one LED
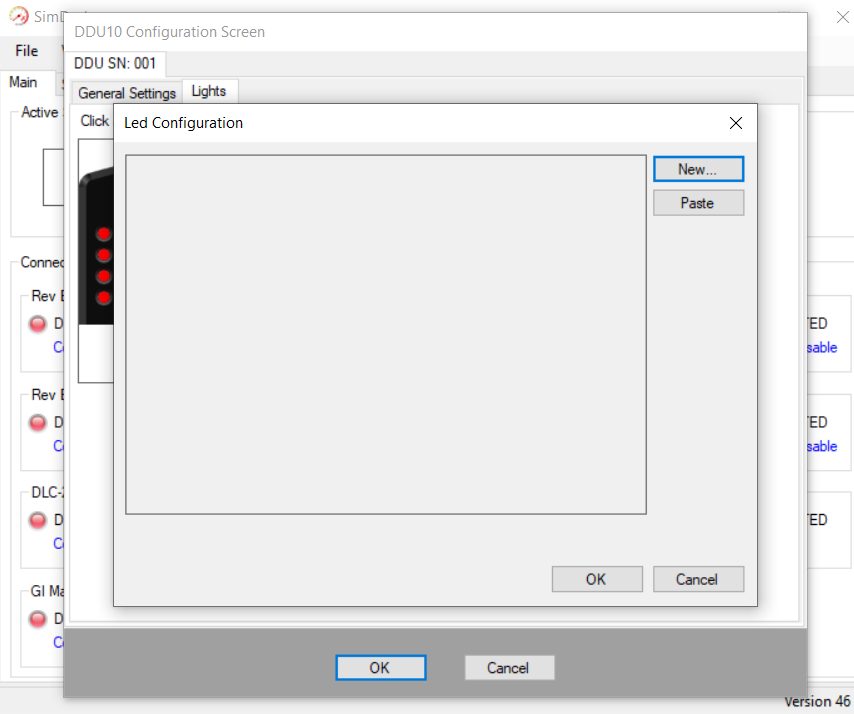
Click the LED you want to configure and the screen above will be displayed. At the beginning it will be empty, because the LED doesn't contain any setting.
Click the "New..." button to start the configuration. In the picture below the LED is configured to switch ON when the engine's RPM is between 6.000 and 7.000 and the LED will blink fast when this happens.
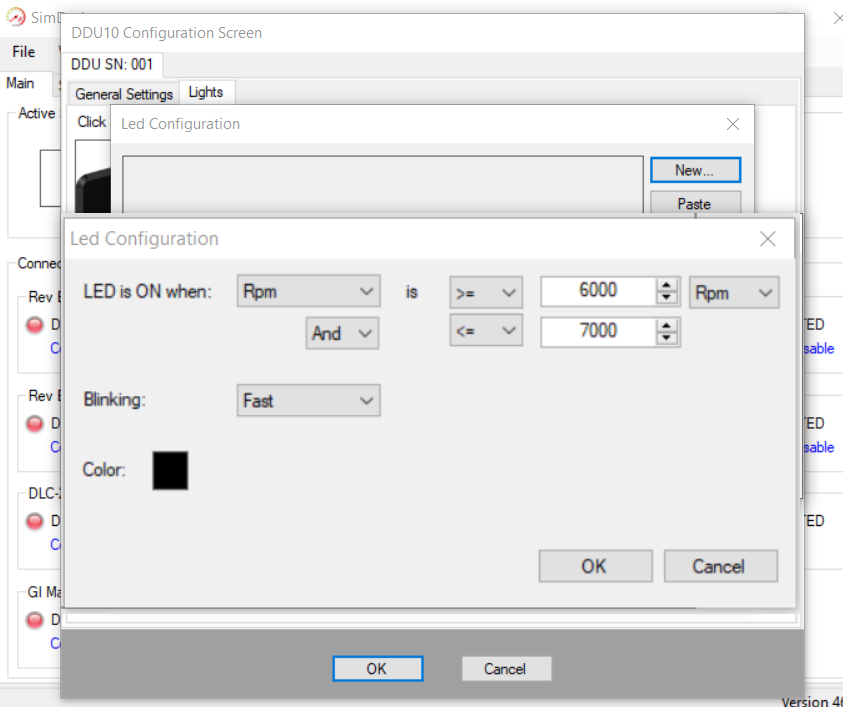
The last step of the configuration is to choose the color for the LED. Click the small color square and the dialog below will be shown:
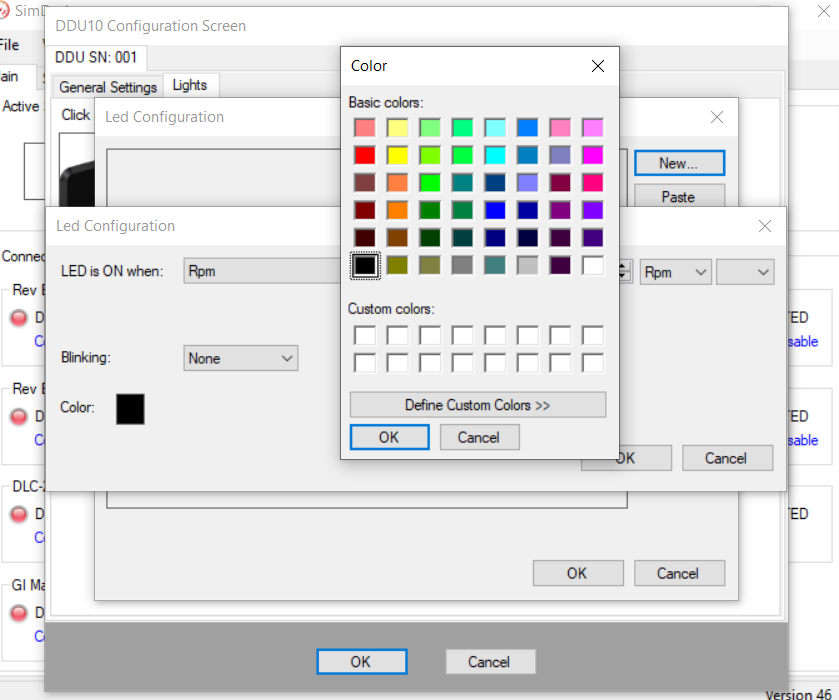
Note that the LED is not capable of representing all the colors that you see on the screen. In particular the very dark ones, like grey, are not displayed correctly. Some are only approximated, but most of them work well.

The picture above shows an LED that has been configured to:
- Display a fast blinking blue color when the engine RPM are above 7.000
- If the engine RPM are NOT above 7.000 the next condition is evaluated: if RPM are above 6.000, the LED will be RED and won't be blinking.
The conditions that determine the color of a LED are evaluated from TOP to BOTTOM and the first one that is satisfied sets the color of the LED and whether is blinking or not.
On the right hand side of each condition there are some buttons, that allow you to do this:
- Move the condition UP or DOWN in the list. The order of the conditions is important because it is the FIRST one that is TRUE that will set the color of the led.
- A condition can be deleted clicking the button with the CROSS.
- A condition can be edited to change the numeric criteria or the color of the LED or the blinking status.
- The button with the Light Bulb will switch the LED on with the color and brightness specified in the condition. It's useful to check if the color we chose looks good or how its brightness compare to the LEDs around.
Quick Config
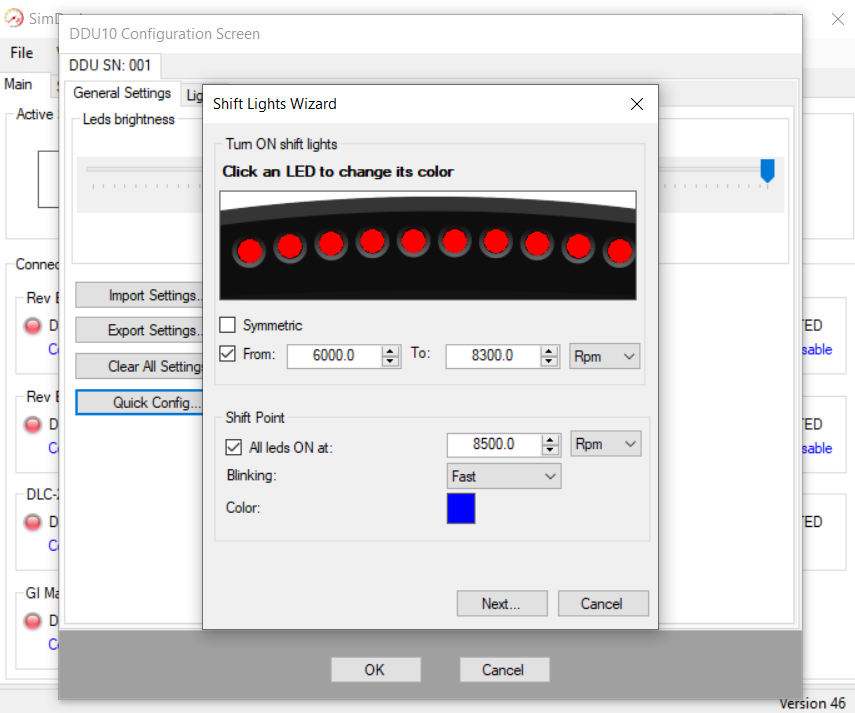
Use the Quick Config Wizard to quickly configure all the LEDs at the same time, rather than one at the time.
The information that can be specified in the first page of the wizard:
- The color of each shift light. Click each led to assign a color.
- The start and end values of the RPM range assigned to the shift lights. The values can be absolute or expressed in percentage of the RPM range for the car (select RPM %). Not all simulators support RPM %. More details contained in this spreadsheet.
- Optionally the shift point can be configured. This is a new color and blinking status for all LEDs, when a specified RPM (or RPM %) value is reached.
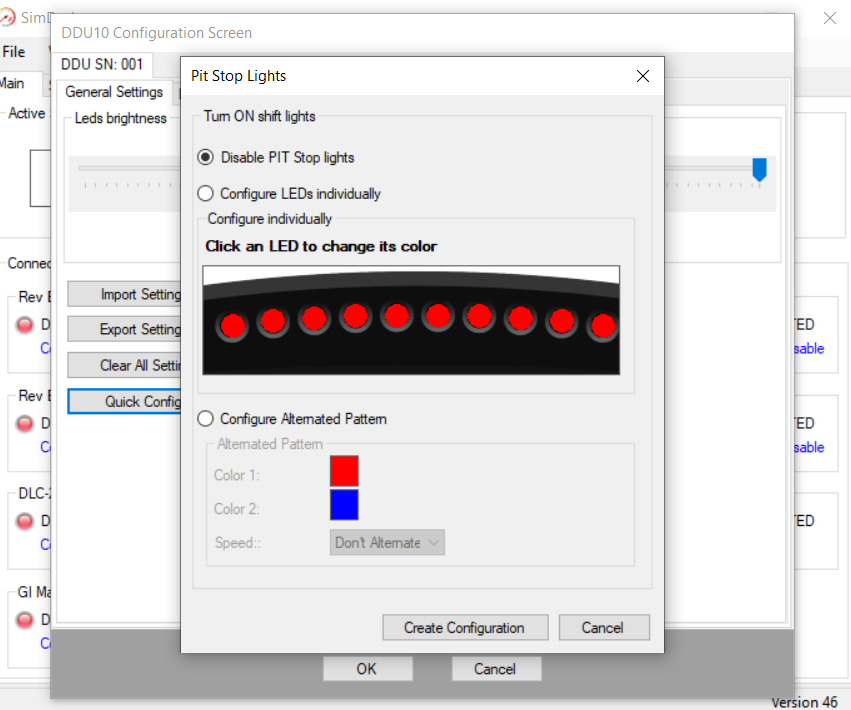
The second page of the wizard is for when the speed limiter is active, in the pit lane. Three options are available:
- Display nothing.
- Select the color of individual LEDs.
- Select two colors to be displayed alternatively and the speed they will alternate.
Configuring the VoCore display
The configuration of the LCD display is covered in this page, that will explain how to enable the display, adjust the brightness and configure the touch screen to move from one design file to another.
With the DDU10 display you will receive a coupon code to enable support of VoCore displays in SimDash. This page will explain how to activate the coupon code in SimDash.
There is a tutorial on how to create new design for the VoCore display. And also few examples to start with.
DDU10
- Product Code: DDU10
-
£109.50
Related Products

DDU5
The DDU5 display is an affordable addition to your simulator. It includes:5" VoCore display.One USB ..
£76.80