
Pro-Gauge Controller: SimHub Plugin Setup Guide
The Pro-Gauge SimHub plugin lets SimHub drive real analog instruments through your Pro-Gauge controller, without SimDash: a rev counter, a speedometer, six small gauges (fuel, temperatures, oil pressure, turbo...) and a relay. Each gauge has its own calibration, so the needles match the dials of your instruments. The plugin works with every game supported by SimHub, and can drive several controllers at once.
1. Download the plugin
Download User.ProGauge.zip.
2. Copy User.ProGauge.dll into the SimHub folder
Close SimHub, then copy User.ProGauge.dll into the SimHub installation folder
(C:\Program Files (x86)\SimHub\,
unless you installed SimHub somewhere else).
Windows may ask for administrator permission to copy into this folder: click Continue.
3. Start SimHub and enable the plugin
Start SimHub. It detects the new plugin and asks whether to enable it. Switch on the Pro-Gauge plugin (the switch on the right, which may start switched off), and leave Show in left main menu on, then click Ok.
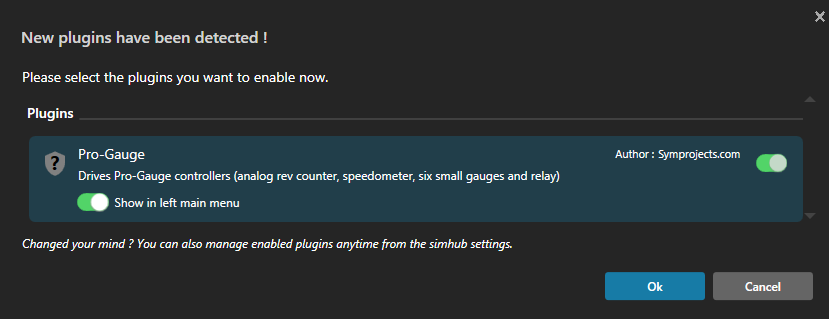
SimHub asks to enable the new plugin: switch it on and click Ok (click the picture to enlarge).
If you clicked Cancel by mistake, you can enable the plugin later from SimHub's Settings.
The controller must be driven by one program only. If SimDash keeps running alongside SimHub, for example because it controls other devices, disable the Pro-Gauge plugin in SimDash. Otherwise SimDash and SimHub will both move the needles.
4. Select your controller
Click Pro-Gauge in SimHub's left menu. Controllers are detected automatically when you plug them in and appear in the Pro-Gauge controllers list with a green dot and Connected - firmware v3. Click a controller to show its settings.
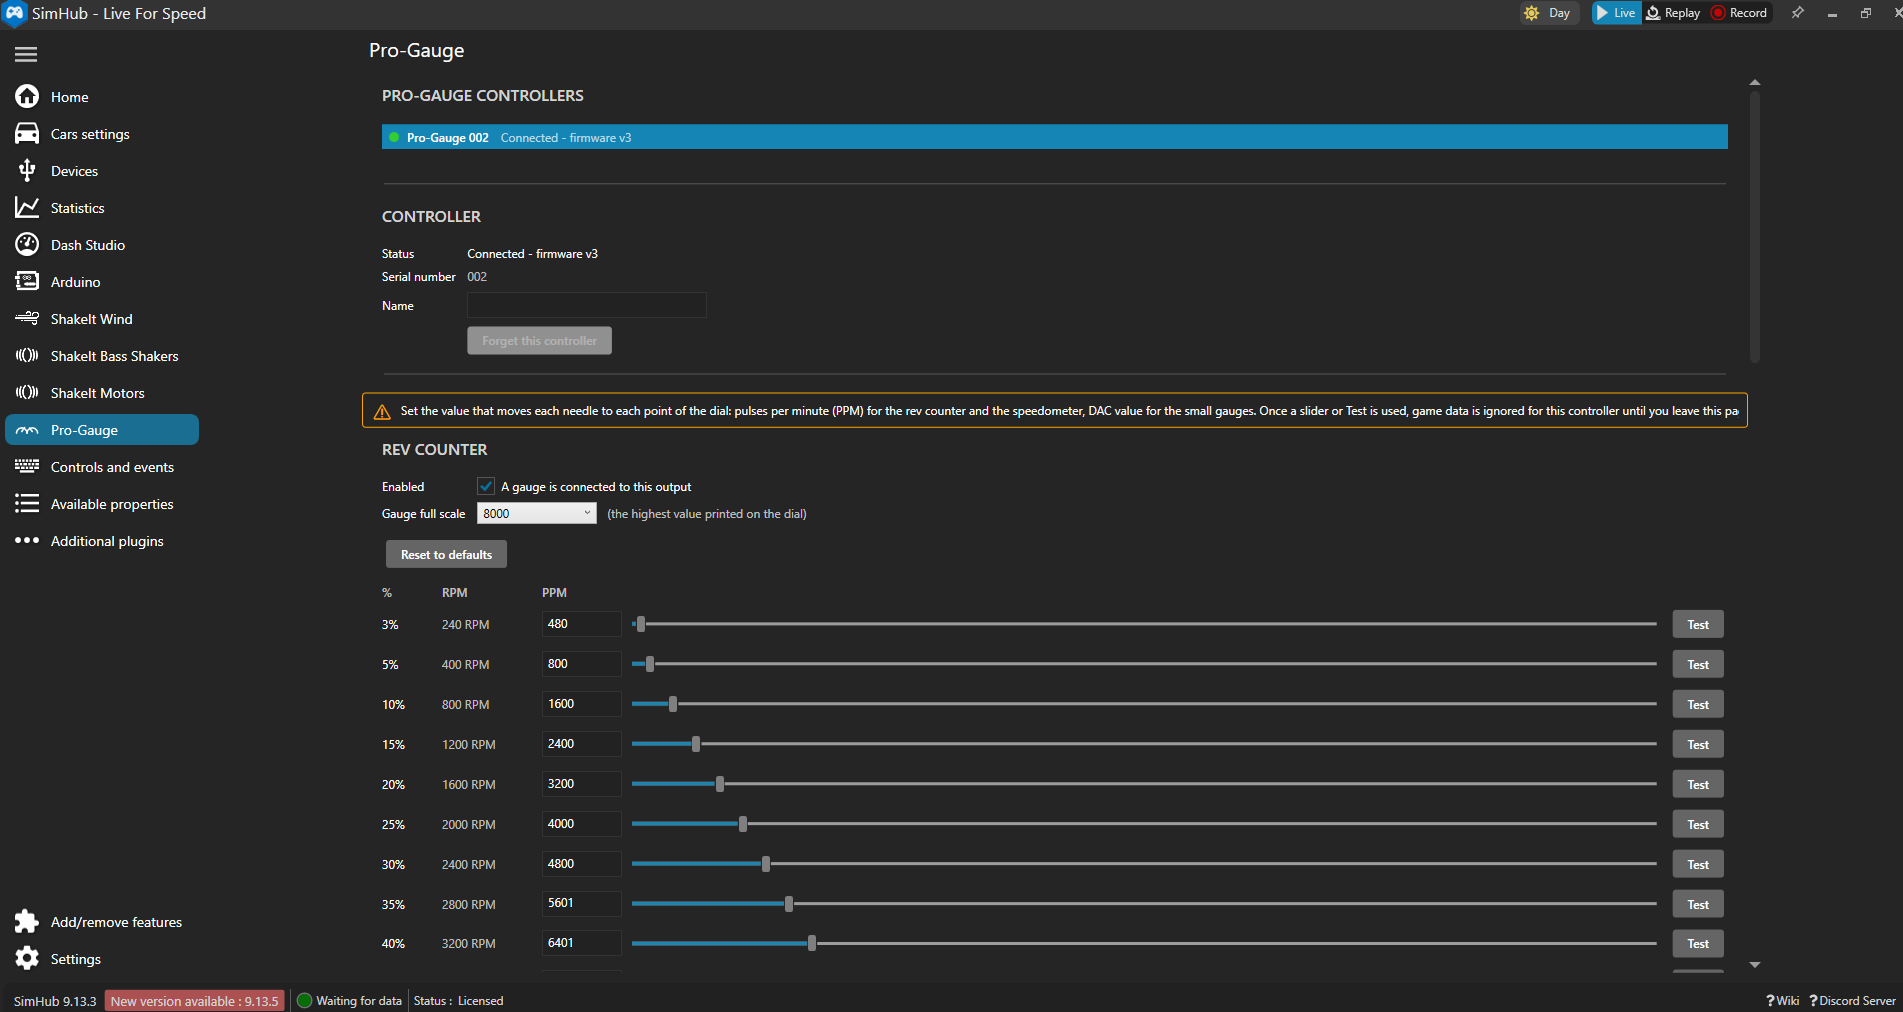
Controller list, controller details and rev counter calibration (click the picture to enlarge).
- Several controllers: each controller is recognised by its serial number and keeps its own settings, so you can use, for example, one controller for the main dials and another for extra gauges.
- Name: give the controller a name (for example Dashboard) to recognise it in the list.
- Forget this controller: removes a controller that is no longer connected, with its settings.
The plugin works with Pro-Gauge controllers running firmware v3 or later. If your controller has an older firmware, it is listed with a message in red and its settings are hidden. Please contact us to update it.
5. Rev counter and speedometer
- Enabled: tick it if a gauge is connected to this output. When unticked, the output stays off.
- Gauge full scale: the highest value printed on the dial. Rev counter: from 1000 to 20000 RPM (for example 8000 for a dial that ends at 8). Speedometer: from 50 to 1000, in km/h or mph. The calibration points are based on this value.
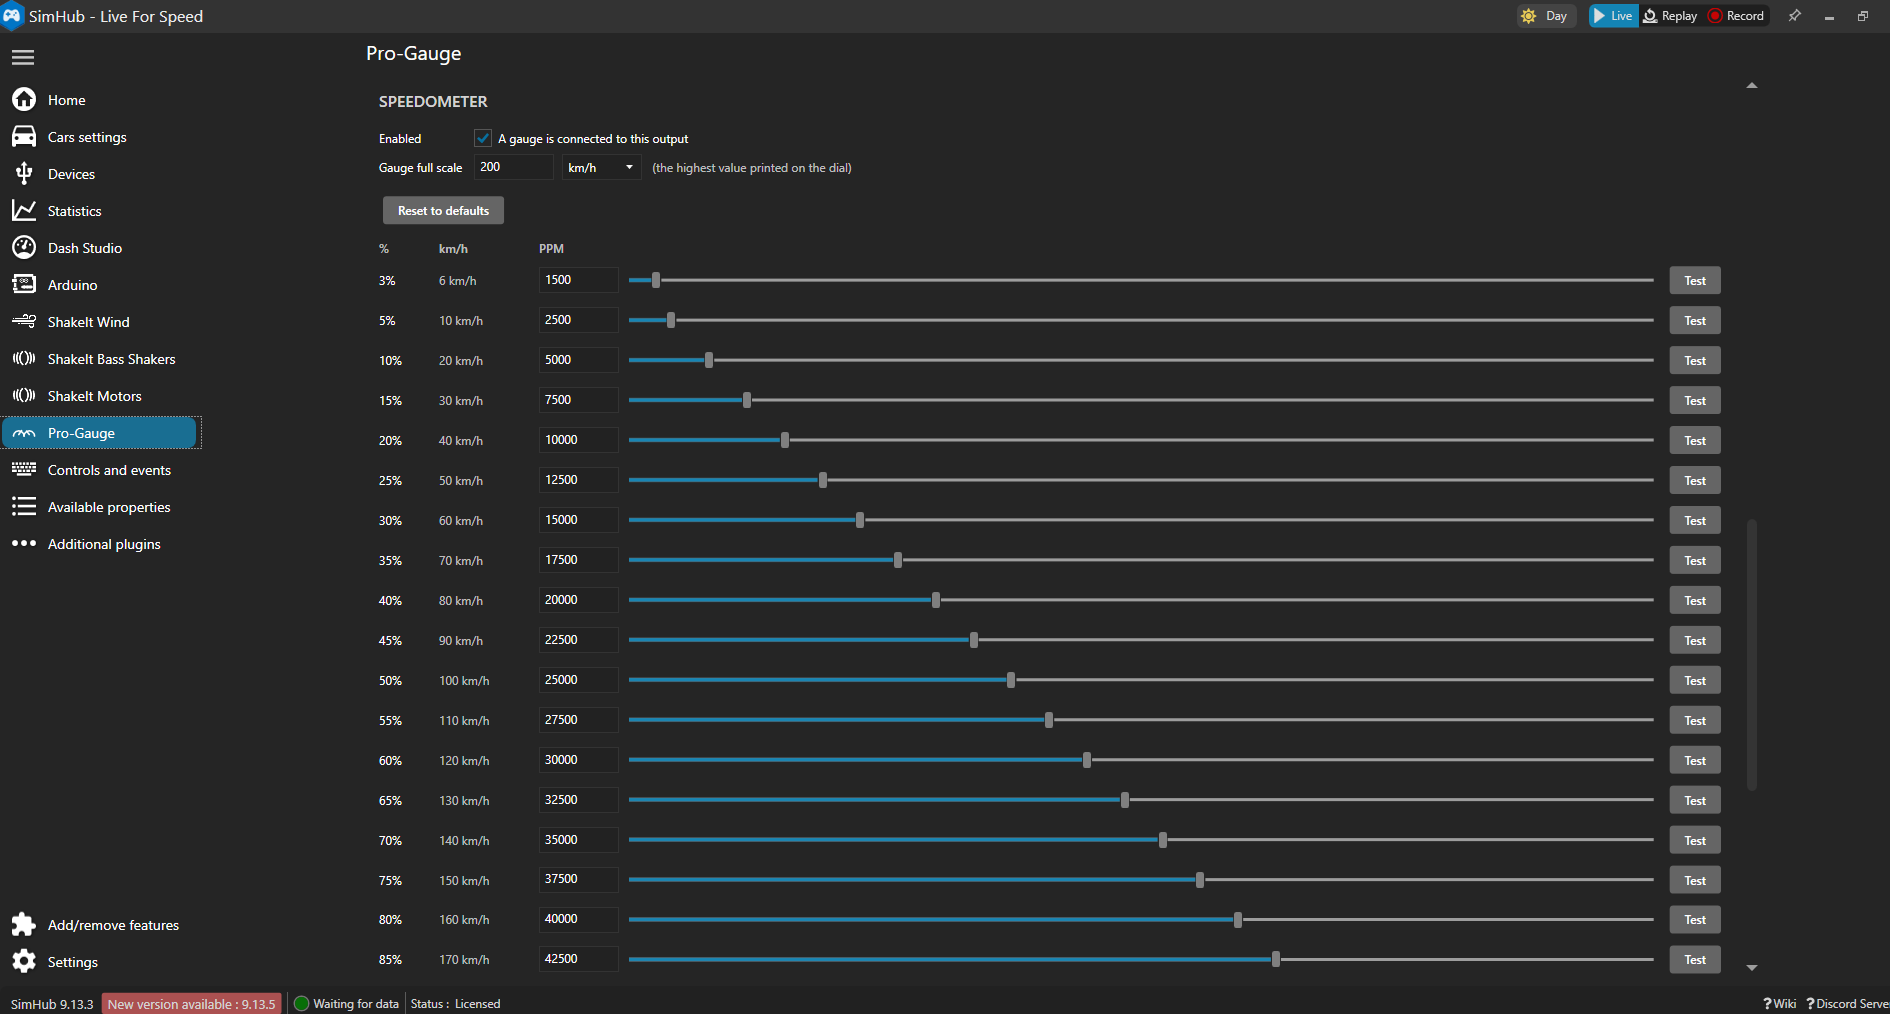
Speedometer settings and calibration (click the picture to enlarge).
Every instrument needs a different signal to reach the same point of its dial. Each of the two gauges lists 21 points of the dial, from 3% to 100% of the full scale, with the matching RPM or speed. For each point you set the PPM (pulses per minute) that moves the needle exactly there. Between two points the plugin interpolates, so the needle moves smoothly. Below 3% the needle stays at rest.
- Slider: drag it and the needle moves at once. Stop when the needle points exactly at the value shown on the left.
- PPM box: type a value and press Enter, then press Test to move the needle there.
- Test: moves the needle to that point, to check it.
- Reset to defaults: goes back to the factory calibration of that gauge.
The PPM values must increase from top to bottom. If they don't, a warning appears in red: check the values you changed.
6. Small gauges
The controller has six outputs for small gauges. Click a gauge's title bar to open its settings; the title shows the data it displays, and (disabled) when it is not in use.
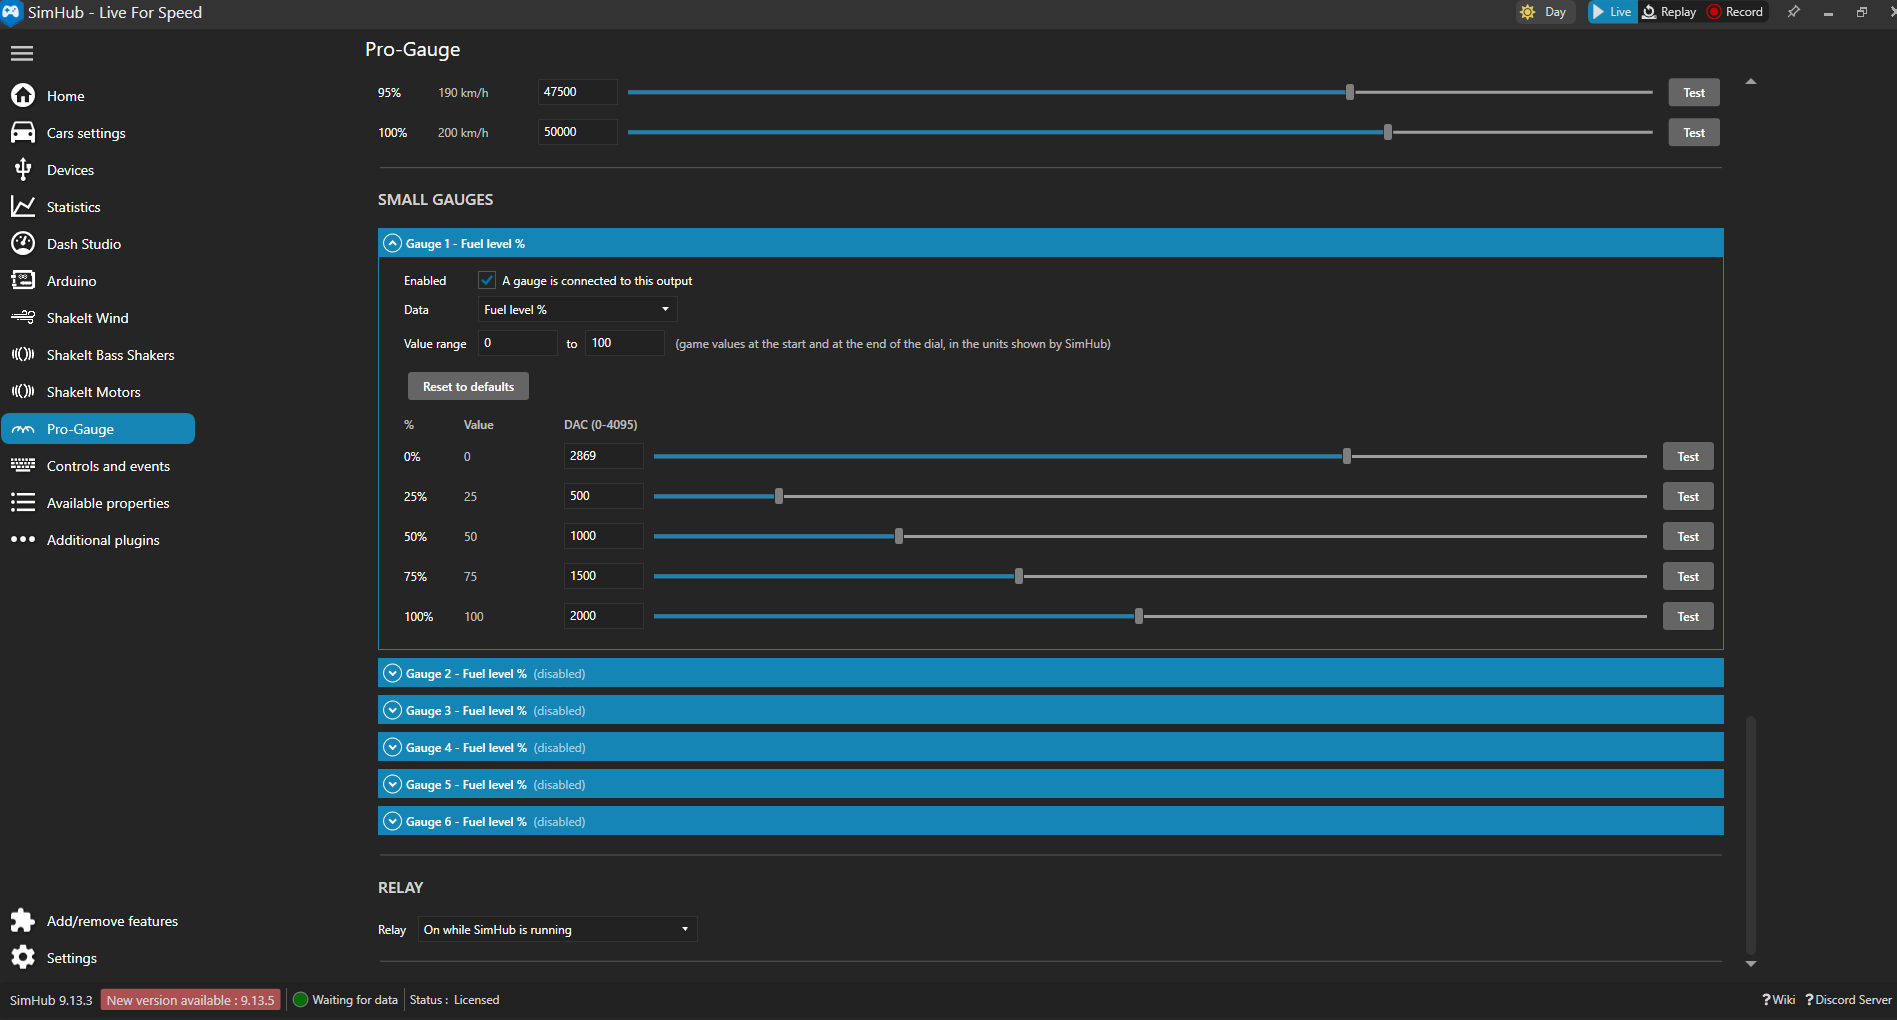
Small gauges and relay (click the picture to enlarge).
- Enabled: tick it if a gauge is connected to this output.
- Data: what the gauge shows: fuel level, fuel level %, water temperature, oil temperature, oil pressure, turbo pressure (bar), turbo %, throttle %, brake % or clutch %. Choose SimHub property / formula to show any other SimHub property, or the result of an NCalc or JavaScript formula (the result must be a number).
- Value range: the game values at the start and at the end of the dial, in the units shown by SimHub (for example 0 to 100 for fuel level %).
- Calibration: 5 points (0%, 25%, 50%, 75% and 100% of the range). For each point set the DAC value (0 to 4095) that moves the needle there, with the slider, the DAC box or Test, as for the rev counter. Values may also decrease, for gauges whose needle moves the other way.
- Reset to defaults: goes back to the factory calibration of that gauge.
When no game is running, each small gauge points at its 0% point.
7. Relay
The relay can switch a light, a fan or the power of your instruments. Choose when it is on:
- Always off
- On while SimHub is running
- On while a game is running
- On while a SimHub property / formula is true or not zero: for example
[DataCorePlugin.GameData.EngineIgnitionOn]switches the relay on with the car's ignition.
All outputs, relay included, are switched off when SimHub closes.
Once you move a slider or press a Test button, the plugin ignores the game's data for that controller, so the needles stay where you put them. The needles follow the game again when you leave the Pro-Gauge page in SimHub or select another controller. The relay keeps following its rule while you calibrate.
Quick start: calibrating your instruments
- Stop the game, open the Pro-Gauge page in SimHub and select your controller.
- Tick Enabled for each output that has a gauge connected, and untick the others.
- Set the Gauge full scale of the rev counter and of the speedometer (and the speed unit).
- Starting from the top, press Test on each point, then adjust its value (slider or box) until the needle shows the value written on the left. Do the same for every enabled gauge.
- For each small gauge, choose the Data and the Value range before calibrating it.
- Leave the Pro-Gauge page and start the game: the needles now follow the game.